Garlic farming is among the profitable agribusiness ideas in Kenya. Kenyan farmers have a huge chance to grow garlic since the country imports roughly 80% of its garlic from China. For this reason, I have decided to create this guide for garlic farming in Kenya to help interested farmers.
Belonging to the onion family, garlic is a valuable horticultural plant due to its high demand and profitable returns. Garlic is also regarded as one of the most beneficial vegetables for daily human intake, health, and medical process. It’s used in the preparation of specific dishes in Kenya and internationally. As a result, its in high demand both locally and abroad.
In this article, I’ll discuss garlic farming in Kenya. You’ll know the different varieties of garlic that performs well in Kenya, how to fertilize and water your garlic cloves after planting. Keep reading to learn how to be a productive garlic farmer in Kenya.
Ecological Requirements of Garlic Farming
| pH | 5.5-6.8 |
| Attitude | 200-500m above sea level |
| Temperature | 12-24 degrees Celcius |
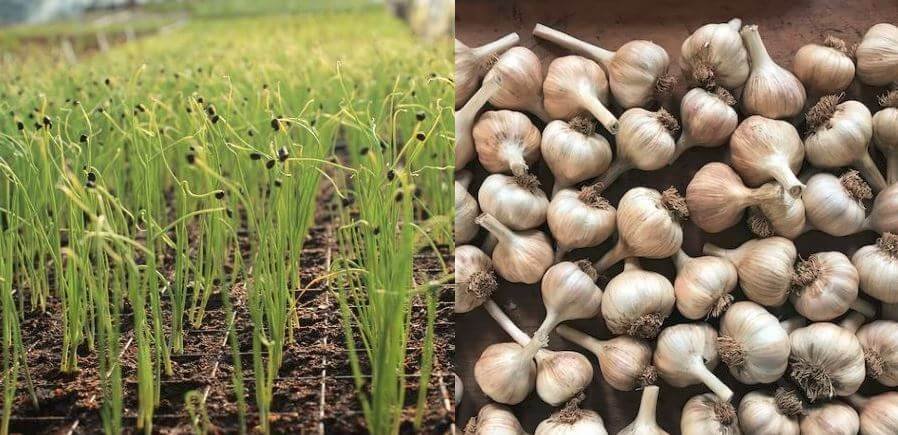
Varieties of Garlic in Kenya
There are three main varieties of garlic that do well in Kenya. They are
- Elephant garlic
- Hard-neck garlic
- Soft-neck garlic
Elephant Garlic

Elephant garlic is characterized by a large head composed of huge cloves. Adding elephant garlic to your cuisine gives you a gentle aroma and subtle flavor. This type of garlic is available in grocery stores.
Also Read: Cost of Garlic Farming in Kenya; a Breakdown
Hard-Neck Garlic
This variety has a strong taste and sweet, pungent odor. Each head contains large but fewer cloves. Its skin is ready and easy to take off. Hard-neck garlic is not commonly preferred in the Kenyan market because it has a short storage life and is easily perishable.
Soft-Neck Garlic
This is the common variety grown in Kenya. Soft-neck is white with purple-like skin, and it’s the simplest type of garlic to farm. This variety yields few but large cloves on each head. It’s also robust and sweet with a pungent smell. Types of soft-neck garlic include; creole, California Late and California Early.
How to Grow Garlic in Kenya
To have plentiful yields when farming garlic in Kenya, you need to understand the ideal climatic conditions and suitable soils necessary for growing garlic. Here, we’ll look at the various stages of producing garlic, emphasizing the essential steps and everything you need to know.
Climatic Conditions
Garlic farming thrives well in medium to high altitudes 200-500m above sea level. Also, it requires high temperatures of 30 degrees for proper bulb formation. However, lower temperatures are recommended in the early stages as they support the necessary vegetative development for plant establishment.
As such, the best temperatures for garlic farming range between 12-24 degrees. It’s essential to note that excessive rain and humidity hinder garlic’s vegetative growth and bulb development. As a result, the crop thrives in places with little rainfall, possibly substituted with irrigation during the initial stage when much water is required.
Best Soil For Garlic Farming
Below is the fundamental soil composition for optimum garlic growth:
- Sulfur: These compounds are linked to garlic’s unique flavors and healing benefits. To add sulfur, sprinkle gypsum over your soil beds right after the plants have sprouted and started to leaf out.
- Nitrogen: Garlic requires more nitrogen than you might think, particularly in the early phases as it grows and spreads its leaves. To increase the nitrogen level in your soil, add organic manure such as cows or sheep manure.
- Phosphorus: Garlic needs sufficient phosphorus for optimum growth and development of roots.
- Potassium: Garlic needs potassium for healthy bulb development and the growth of leaves.
- pH: Garlic growing requires soils with a neutral pH between 5.5 and 6.8. Therefore garlic farming is suitable in most Kenyan lands, provided they drain well, as garlic performs poorly in water-logged soils.
Expert Tip: You should not grow garlic in clay soil as it hinders the enlargement of the bulb.
Land Preparation
You should begin by conducting the soil test to determine the soil type on your land. It will help you know if you’ve got the right soil for garlic farming and, if not, how to make it better. If your soil isn’t suitable enough, worry not. Garlic is a robust crop that performs well in marginal soil.
You’re only required to add organic fertilizers to your soil, such as manure and alfalfa, and use cover crops to help improve poor soils. You need to prepare the soil on your farm adequately. Garlic thrives well in loose soil.
You should til your land to a depth of 6-8 inches. If your land has compact soil like clay, you can fill the bottom of the trench with a layer of rocks.
Nursery Preparation
Planting garlic seeds in a nursery isn’t recommendable in Kenya. All you need is to purchase germinated cloves from a reputable dealer.
Transplanting and Spacing
Planting garlic is not as hard. The following is the procedure to transplant garlic:
- Using a hoe, dig 3 inches deep trenches. If your land has compact soil like clay soil, you should dig a row 6 inches deep.
- Add a slayer of small rocks or gravel at the bottom of the trench.
- Fill the rows with loose, airy soil that is fine in texture.
- Using a hoe, poke a hole in the soil 2 inches deep. You have to ensure good soil drainage.
- Plant your cloves placing roots down and covering them with loose and airy soil.
- Slightly water your plants after planting.
Expert Tip: You should space your cloves 6 inches apart. Spacing between the row should be around 24 inches apart.
Mulching and Fertilizer Application
After planting your garlic seeds, you should protect them from severe conditions by using a thick layer of mulch. You can use between 4 to 6-inch layers of grass, straw, or chopped leaves and place them above the rows.
By doing so, the seeds will insulate, safeguarding them from harsh winter conditions. You should remove the mulch on the first day of spring when the temperature is between 55-60 degrees since this is around when the garlic seed will begin to sprout.
Once you remove the mulch apply the right all-purpose fertilizer every 30 to 40 days. The ideal fertilizer is 5-5-5 or 10-10-10, which specifies the amount of Phosphate, Potassium, and Nitrogen in that particular fertilizer.
Apply the fertilizer by sprinkling its granules on the sprouting garlic, be careful to avoid the granules touching the actual plant because they can cause harmful effects or burn the crop. Many manufacturers advise applying the fertilizer at a rate of ¾ per 100 square feet.
Watering
Garlic requires a small amount of water. Always ensure there is proper drainage. If you grow garlic in regions with low rainfall, water your plants once every two weeks. You should start watering your garlic immediately after sprouting.
Depending on your soil’s condition, you should minimize irrigation because if garlic grows in waterlogged soil, it will begin to rot. Light watering that is 1-inch deep is enough. Otherwise, no watering is required if there is a fair amount of rainfall every 10 to 14 days.
How Long Does Garlic Take to Grow in Kenya
Garlic takes approximately 4- 6 months to mature in Kenya. However, this depends on the weather condition and the seed type used.
Garlic Harvesting and Storing
You should never harvest your garlic too early or too late as it will affect the quality of the produce. To determine the appropriate harvesting time, you must track the growing months for approximately 4 to 6 months.
Determining the precise time to harvest can be challenging as some of the garlic’s heads sink in the soil, and different varieties have varying maturity periods. As a result, to determine when to harvest, you should examine the foliage and see if it has turned brown and withered back.
After uprooting your garlic, bundle them in tens or fifteen and leave them to dry in a well-ventilated room. Store them there for 3-4 weeks, after which the roots and shoots will have dried.
Remove the outer skin without exposing the cloves after cutting down the tops approximately 1-inch above the main bulb and roots. Remove any remaining soil, and your garlic will be ready for market.
The storage environment of garlic depends on whether you’ll use it as planting or table stock. If you need your garlic as table stock, store them at 0-4 degrees or 60-70 %humidity. The reason being moisture levels above 70% will encourage rooting, while temperatures above 4 degrees will stimulate sprouting.
Planting stock, on the other hand, requires storage at room temperature with 60-70% relative humidity.
Bottom line
Are you looking for an agri-business with a ready market? If yes, then garlic farming is your ideal option. Garlic farming in Kenya is profitable when done appropriately, with the demand for garlic peaking in May, June, July, August, and September.
Garlic farming offers a significant opportunity to Kenyan farmers as the country imports around 80% of garlic from China. However, the garlic farming process in Kenya is very sensitive; therefore, you must learn to spot the root of every problem encountered and how to handle the difficulties.